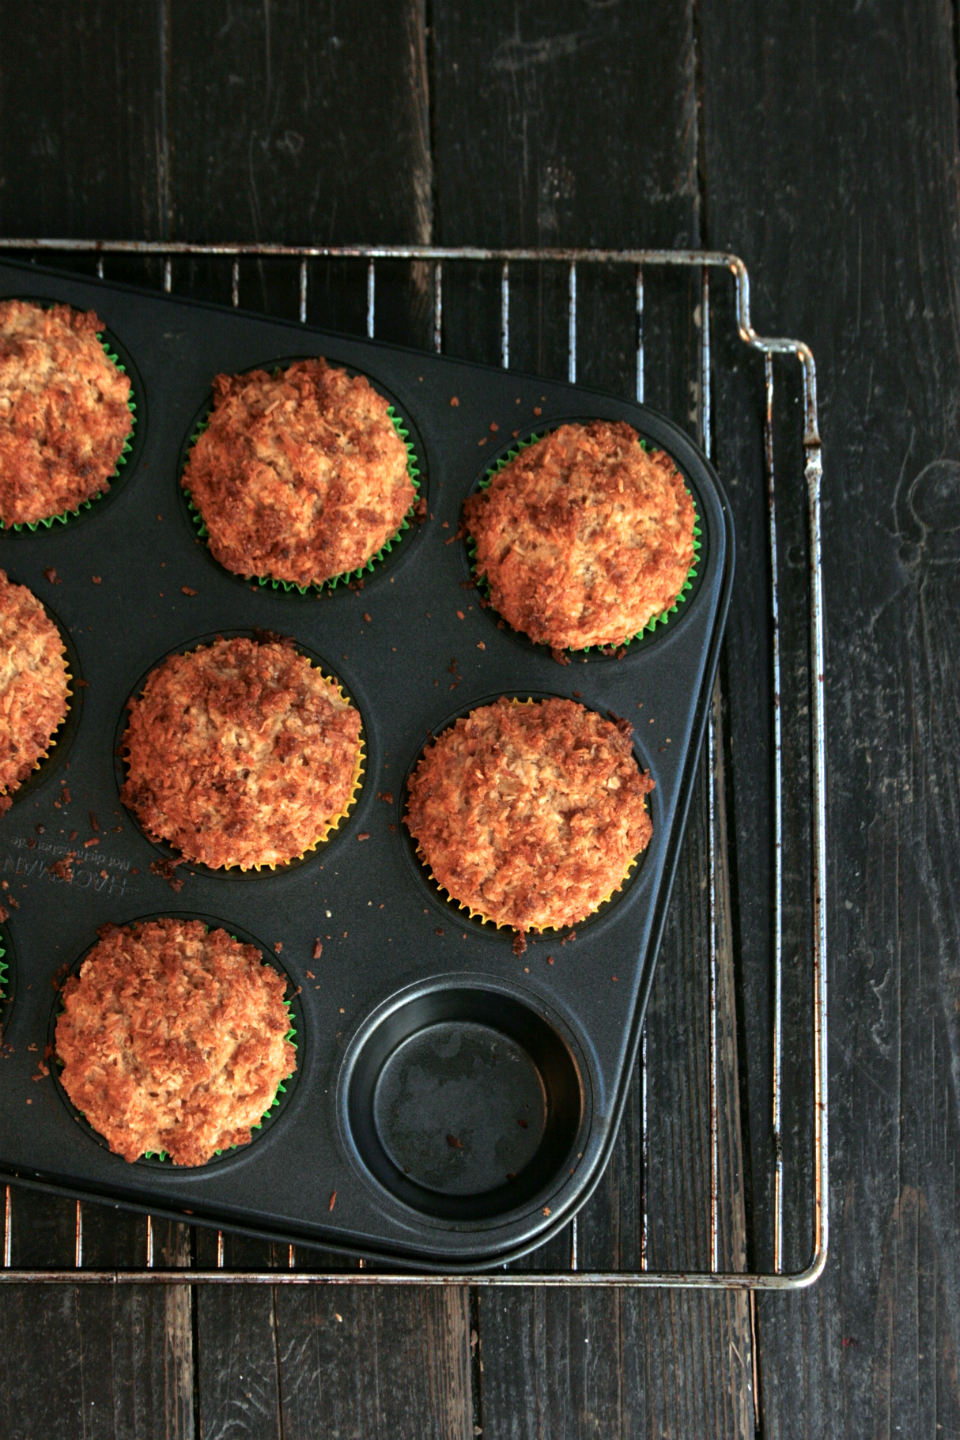
Showing posts with label recipe. Show all posts

Tuesday, July 16, 2013

grapefruit soda syrup

"My Heart is Heavy" by Sara Teasdale

My heart is heavy with many a song
Like ripe fruit bearing down the tree,
But I can never give you one --
My songs do not belong to me.

Yet in the evening, in the dusk
When moths go to and fro,
In the gray hour if the fruit has fallen,
Take it, no one will know.

Grapefruit Soda

It is hard to believe that it is mid-July already, meaning that we are halfway through summer, and therefore practically almost done with already. Truth to be told, this summer has turned out very different than I ever imagined, with whirlwinds of big changes and big emotions in my life.

The blessing of it all is that right now, I am in a place where nothing is happening. Where I get to decide what to do with my days. In the midst of the big changes, it has been comforting to go back to the simple things. Those things that create consistency; that let your soul have a moment of stillness and calm; that bring joy and excitement. For now, it means slow mornings with a cup of coffee and a book to read, discovering at the farmer's market, wondering into the forest to go berry picking, spending time in the kitchen using whatever you found that day. It means making the best of this summer, spending my days exploring and wandering.

Grapefruit Soda

I used to be a big diet soda drinker. Then, I started becoming sick from artificial sweeteners and gave up everything that contained those - including diet soda. I have never cared for regular sodas, not until now. This homemade soda makes a nice treat on a hot summer day, and it is perfect to bring along to a potluck or picnic.

For a more refreshing soda, I love to squeeze some grapefruit juice on the bottom of the glass before adding the sparkling water. The grapefruit syrup is sweet and can take that pop of tartness, making this drink rather irresistible.


Grapefruit Soda Syrup
slightly adapted from Martha Stewart
makes about 3 cups

zest of 2 pink grapefruits
juice of 1 pink grapefruit
juice of 1/2 lemon

1 1/2 cups granulated sugar
1 1/2 cups water
a hefty pinch of salt

In a saucepan, combine all the ingredients. Bring to a boil, then turn off the heat and cover the saucepan. Let steep for an hour, then strain into a bottle or an air-tight container. Refrigerate up to two weeks.


Grapefruit Soda

For homemade grapefruit soda, combine about 1 ounce (2 tbsp) of the syrup with a cup of sparkling water. Add a squeeze of grapefruit, or even lemon, if desired. Enjoy!

Monday, June 3, 2013

simple vanilla rhubarb compote

Silence on this blog carried for longer than I thought, or wished for. There were weeks of working and studying, then doing exams and finally closing in the last few busy weeks at work. And now, I find myself in a place where I can only wonder what my future will hold. Will I be studying? Working? Doing something completely different? I feel as if all is possible, and I find that can be a rather scary thing.

Blooming apple tree

These past few days, we have been enjoying extremely warm weather here in Finland. I feel as if we really waited for spring, for a long time and suddenly, it is summer. It has been amazing to look at the nature, to see the swift changes in the nature and how those blooming flowers and trees are now adorning the scenery all around.

In these days of, well, waiting for my future to shape up, I have found it easier to focus on the small things of the everyday life. Because really, when you are in a place where you can only trust God to have control over your life. It is better to concentrate on the things that are in the here and now, instead of dwelling on and worrying over things that are out of your hands. So I have been focusing on those moments that can easily slip by unnoticed; the simple blessings of the everyday life. A warm breeze on my face, wonderfully fragrant flowers (lilacs and lilies of the valley right now), those quiet and still moments with a cup of coffee in my hands in the morning, a word of encouragement, an unexpected act of kindness and love. The list is endless, really, which makes it all the more better.

Vanilla Rhubarb Compote

The recipe I have for you today is a very simple one. Partly because I feel like it fits this season through and through. Partly because it allows me to ease back into blogging rather nicely. Mostly because many good things in life are very simple, as is with this compote.

For this compote, rhubarb is stewed with some vanilla and brown sugar to hit both the sweet and tart notes. This compote isn't much of a looker but it sure is delicious. The tartness of the rhubarb pops in at first, then gives way to the sweetness enhanced by the vanilla and that hint of caramel from the brown sugar. I have been adding spoonfuls of this rhubarb compote to bowls of plain yoghurt and honestly, I can't get enough. It is also great with vanilla ice cream. (Just sayin'.)

Vanilla Rhubarb Compote

Simple Vanilla Rhubarb Compote
makes about 1 cup

This makes a somewhat small batch but that is a good thing, as this compote stays well for about a week or so. I find I go through the batch rather quickly, adding spoonfuls to plain yoghurt and ice cream. 

250g rhubarb, peeled and diced
80g granulated sugar
40g brown sugar
1 tbsp water
1/2 tsp vanilla bean paste

In a saucepan, combine the diced rhubarb, sugars, water, and vanilla bean paste. Over medium-high heat, bring the mixture to a boil, then turn the heat to low. Cook until the rhubarb is soft, about 15 to 20 minutes. Refrigerate in an air-tight conditioner.

Thursday, March 28, 2013

chickpea and kale soup

Chickpea and Kale Soup

Behind the silence on this blog, I have moved. Into a new (well, new-to-me) apartment (well, studio); on my own for the first time. These past few weeks have been spent packing and unpacking, working and sleeping, learning new routines and what it means to live alone, running errands and doing things I never even thought of before. The day before moving, I went back to work from my study break with five more hours a week on my contract.

It has been busy, to say the least.

Spring is finally making its way here, though, the warmth of the sun melting all the coldness away. After months of all hues of gray, the sudden brightness is sure to refresh and recreate. In the wake of the life that seems to be stirring up, a craving for lightness is grasping a tighter hold, making itself noticed. The nights still remain cold and I am reluctant to completely let go of the comfort of that a bowl of hot soup brings. So this soup was made, to tide over the business and the days of undecided weather.

Chickpea and Kale Soup 3
This is simple yet flavourful soup is sure to satisfy. A spin-off on the minestrone I often make, this soup is both light and somewhat hearty, thanks to the kale and chickpeas. To make this a meal on its own, you could add a cup of small pasta or elbow macaroni when adding the kale and chickpeas and cook until the pasta is done, about 10 minutes. Serving this soup with some good whole grain bread is highly recommended.


Chickpea and Kale Soup
serves 4

1 tbsp extra-virgin olive oil
1 yellow onion
2 garlic cloves
2 to 3 medium carrots
2 to 3 celery stalks

1 tsp dried basil
1/2 tsp dried thyme
1/4 tsp dried oregano
a pinch of red pepper flakes
1 (400g) can diced tomatoes
3 to 4 cups vegetable stock

1 (400g) can chickpeas, drained and rinsed
2 to 3 cups chopped kale
Salt and ground black pepper to taste


Peel and dice the onion and carrots. Peel and mince the garlic. Wash and dice the celery stalks. In a saucepan, heat the olive oil over medium-high heat and add the onion, carrots and celery. Sauté for a few minutes, then add the garlic. Sauté until the onion starts softening; add the spices, diced tomatoes and vegetable stock. Bring to a boil and simmer, covered, for 25 minutes, stirring once in a while.

After the 25 minutes, add the chickpeas and kale. Simmer until the soup is heated through and the kale has wilted, about 10 minutes. Season to taste.

Tuesday, March 5, 2013

citrusy raspberry cornmeal cake

Citrusy Raspberry Cornmeal Cake

March came with a hefty snow storm. The icy roads became even more slippery and the shoveling continues. Evenings are spent with a blanket wrapped around the shoulders, a mug of tea in hand, fighting the chills while dreaming of the snow melting away. Yet there is something good even in this: a snow storm in March calls for baked goods, something cozy and sweet to drive away the blues settling in.

In my opinion? Nothing fights the blues as well as a cozy cake, bursting bright with juicy berries and citrus fruit.

Citrusy Raspberry Cornmeal Cake 3

These cozy everyday cakes have stolen my heart. Now, it is not likely that I would turn down any kind of cake, let alone a fancy one. But there is something in these cakes, fit for any - and every - time of the day. Usually they aren't anything special to look at; nothing to make them stand apart. Yet when given the chance, they take their place, providing that easy and sweet moment of time that is meant to be enjoyed.

Another thing that I love about everyday cakes is their easiness. Best times with only one bowl and a spoon, these cakes are delicious as they are, stripped bare. Yet they can be fancied up easily, with a simple frosting or maybe whipped cream, without having to put hours into it. Honestly, what's not to love about that?

Citrusy Raspberry Cornmeal Cake 2

This cake, I can't help but love. The slightly coarse texture from the cornmeal makes the cake really interesting. Raspberries and that hint of citrus fruits provide a burst of brightness. For serving, crème fraîche is mixed with lemon curd to enhance the citrus flavour while the slight tang brings everything together.

Originally, I wanted to make this cake with a clear taste of lemon on the background but as it happened, I forgot to buy lemons. We had a grapefruit, though, so that's what I used and ended up loving it. Whether you use lemon or grapefruit or even orange for that matter, it will be delicious.


Citrusy Raspberry Cornmeal Cake with Lemon Curd Crème Fraîche
adapted from bleubird blog
makes one 9-inch cake

1/2 cup butter, room temperature
1 cup sugar
2 large eggs
1 to 2 tbsp lemon curd
1/2 tsp grapefruit or lemon zest
1/2 tsp pure vanilla extract

1 cup all-purpose flour
1/2 cup cornmeal
2 tsp baking powder
1/2 tsp salt

1/3 cup sour cream
2 cups raspberries, fresh or frozen


Preheat oven to 175C (350F). Grease and flour a 9-inch round cake pan.

In a bowl, whisk together the flour, cornmeal, baking powder and salt; set aside. In another bowl, beat together the butter and sugar until light and fluffy. Beat in the eggs one at a time, then beat in the lemon curd, zest and vanilla.

Set aside about 1/4 cup of the flour mixture. Stir in 1/2 of the remaining flour mixture to the wet ingredients until just combined. Stir in the sour cream, then the other half of the flour mixture until just combined. Combine the raspberries with the 1/4 cup of the flour mixture; fold in to the batter. Pour the batter into the prepared pan. Bake for about 40 to 45 minutes, or until a toothpick inserted in the center comes out clean. Let it cool to room temperature before serving. Serve with a good dollop of lemon curd crème fraîche.


Lemon Curd Crème Fraîche: mix 1 cup of crème fraîche with 4 to 5 tbsp of lemon curd.

Thursday, February 21, 2013

cowboy cookies

When life gets too hectic, what do you do?

I have an ability to make my life rather busy at times. Somehow it all builds up, unnoticed. In the midst the daily routines, you start new projects, help a friend or a family member, find a new hobby, work on that never-ending to-do list or on your New Year's resolutions. Suddenly, you find yourself staring at your calendar with that to-do list in hand, wondering where to fit in everything that needs to be done this week - or today.

Eventually there will be a time when you have to sit down, to schedule your life all over. Something needs to be cut out, set aside for a moment or two until you can catch up on your life again. Or if you are in denial, you try to continue to make it through. I have tried that as well.

Texas Cowboy Cookies

But when life gets hectic? I start baking.

It should not make sense to me, that out of all things I can do I always go back to baking. Yet it somehow does. Though baking takes time and energy, both of which I lack at times, the result is worth it. And these cookies are somehow perfect for this situation. They are everything at once and first, it is difficult to get a clear picture on exactly what they are trying to be. Sweet and crunchy, yet also slightly chewy in the center. Packed with all the good stuff; chocolate, coconut, oats. It doesn't take long for everything to fall into its place and suddenly, these cookies were just that thing that was missing.

And it doesn't hurt that these cookies are huge.


Laura Bush's Cowboy Cookies
adapted from a cup of mascarpone
makes about 1 1/2 to 2 dozen cookies

1 1/2 cups all-purpose flour
1 1/2 tsp baking powder
1 1/2 tsp baking soda
1 1/2 tsp cinnamon
1/2 tsp salt

170g (3/4 cup) butter
1 cup packed brown sugar
1/2 cup white sugar
1 1/2 large eggs
2 tsp vanilla extract

1 1/2 cups milk chocolate chips or chopped milk chocolate
1 1/2 cups old-fashioned rolled oats
1 cup shredded coconut
1 cup pecans or walnuts (optional) *


Preheat oven to 175C (350F).

In a bowl, whisk together the flour, baking powder, baking soda, cinnamon, and salt.

In another bowl, beat together the butter with an electric mixer until creamy. Add in the sugars and beat for a couple minutes. Beat in the eggs, one at a time, and then the vanilla. Reduce the speed to low and add the flour mixture, beating until just combined. Stir in the chocolate chips, rolled oats, coconut and nuts, if using.

Drop 1/4 cup of dough on a baking tray lined with parchment paper, leaving about 3 inches between the cookies. Bake for 8 to 9 minutes, then turn the baking tray around (front to back) and bake for another 8 to 9 minutes, until the edges have slightly browned.


* Note: Because of nut allergies in our family, I didn't add nuts to these cookies. The original recipe calls for pecans, though I think walnuts would also be delicious.

Wednesday, February 13, 2013

sour cream banana bread

When we lived in the States, I used to babysit for a Finnish-American family with three sweet under 4-year-olds. Let me tell you, all of those kids absolutely loved bananas. There would always be a huge bunch of them sitting on the kitchen counter and the kids would munch on them whenever given one. Sometimes, though, it happened that a few of those bananas went brown. Those times, the mom would bake banana bread that, in my opinion, was the best of them all.

Somehow, though, I never got the recipe. Since moving back to Finland, I have been making banana bread every now and then, trying different recipes to find the right one, like hers. Finally, a few months back, a friend of mine had baked banana bread and to my surprise, it tasted very much like the banana bread I had been craving for so long.

Banana Bread

Bananas in this household usually get brown and baked into something. I buy bananas every now and then, usually for running fuel, or sometimes Grandma gives me a bunch. Often I manage to eat only one or two before they are sitting forgotten in a corner, getting brown. Yet, I find it difficult to feel bad about this because brown, spotty bananas mean delicious baked goods. And those baked goods are made without guilt because hey, those bananas really needed to be used.

This banana bread is sweet with a hint of caramel, thanks to the brown sugar and vanilla. The spices come through just so, deepening the sweetness and the flavour of the bananas. It is somewhat dense, yet with a soft, tender crumb. You can skip the crumb topping if you want more of a breakfast-like banana bread; for me, this (like all banana breads) falls into the dessert category and the crumb topping is more than welcome.

Sour Cream Banana Bread

Sour Cream Banana Bread
adapted from Allrecipes
makes 1 (9x5-inch) loaf and a few muffins OR 2 smaller (7x4-inch) loaves

I halved the original recipe as it is rare that I would have 6 very ripe bananas at the same time. If at any point you do have, though, I'd suggest making the whole recipe (that is, doubling this recipe), yielding three (9x5-inch) loaves, and freezing one or two.

2 tbsp white sugar
1/2 tsp cinnamon

90g (6 tbsp) butter
3/4 to 1 cup white sugar (depending how sweet you like)
1/3 cup packed brown sugar
2 eggs
3 medium very ripe bananas, mashed
225g sour cream
2 tsp vanilla
1 tsp cinnamon
a good pinch of nutmeg
a pinch of cloves

2 1/4 cups all-purpose flour
1 1/2 tsp baking soda
1/4 tsp salt

Crumb topping:
1/2 cup packed brown sugar
1/2 cup all-purpose flour
1/2 tsp cinnamon
40g cold salted butter


Preheat oven to 160C (325F). In a small bowl, combine 2 tbsp white sugar and 1/2 tsp cinnamon. Grease a loaf pan (or pans) and dust it with the cinnamon sugar.

In a bowl, cream together the butter and sugar. Beat in the eggs one at a time. Mix in the mashed bananas, sour cream, vanilla, cinnamon, nutmeg, and cloves. Stir in the flour, baking soda, and salt. Pour the batter into the prepared pan(s).

In a small bowl, rub together the brown sugar, flour, cinnamon and cold butter until the mixture resembles sand. Sprinkle the crumb on the top. Bake the 9x5-inch loaf for about 1 hour 15 minutes, 7x4-inch loaf for about 1 hour and muffins for about 25 minutes, until a toothpick inserted in the center comes out clean.

Thursday, January 24, 2013

cauliflower red lentil stew

A sunny Monday makes a happy Monday. (21/365)

Though I am trying to convince myself that I don't like winter, the sunny winter days that I have been enjoying lately are telling me otherwise. Vibrant blue sky during the day, piles of pure white snow glimmering in the sunlight, frosty tree tops, starry sky in the night - it is all so very beautiful. After the darkness of the past month or two, I am soaking up every moment of light and cherishing the warmth of the sun on my cheeks. Though my nose still gets bright red and my fingers frozen numb whenever I am outside, the days are finally getting longer and lightness is once again taking its place.

It is cold, though. Very much so. The past Saturday was the coldest this winter, the temperatures around -10F here. It isn't quite as bad anymore but there are days when the cold seems to be set in my bones. Those days, I'll take all the warmth I can find, from many layers of clothes to bowls of soup and mugs of tea.

cauliflower red lentil stew

I have been making this stew for a couple years now, and it is a family favourite. This is the stick-to-your-ribs kind of stew; hearty yet healthy, and spicy just the right way. Though I love this thick stew, it could also easily be turned into a soup by adding more stock. Whichever way, this is a wonderful meal to power you through the cold days.

The last time I made this was last winter, a few days after Christmas. A snow storm was passing through Finland so I made a pot of this stew for dinner, to warm us up. Many households in the area had lost electricity because of the storm and we were practically waiting to lose ours. Just as I turned off the stove, the stew ready, the power went out. That evening, we ate our dinner by candlelight, then camped close together on the couch.


Cauliflower Red Lentil Stew
adapted from Food52
serves 6 to 8

1 1/2 cups red lentils, picked over
warm water

2 tbsp olive oil
1 large onion, peeled and diced
3 garlic cloves, peeled and minced
2 tsp grated fresh ginger
2 1/2 tsp curry powder
1 tsp ground cumin
1 tsp ground coriander

2 to 3 cups vegetable or chicken stock
4 carrots, peeled and sliced
1 medium head of cauliflower, trimmed and cut into florets

+ plenty of fresh cilantro to serve


Measure the lentils into a bowl and cover with at least 2 inches of warm water; set aside.

In a large pot, heat the olive oil over medium heat and sauté the onion. When the onion starts to soften, add garlic, ginger, and spices; sauté for 1 minute. Pour the red lentils with the water into the pot and add the stock. Bring to a boil; turn down the heat to medium low. Add the sliced carrots and simmer, stirring occasionally, for 10 minutes. After the 10 minutes, stir in the cauliflower florets. Add more water, if needed. Cover and simmer for 20 minutes, stirring occasionally. The more you stir, the more the cauliflower florets are going to break down, though.

Salt to taste and serve with plenty of fresh cilantro.

Thursday, January 17, 2013

coffee pudding with lemon cream

Coffee pudding with lemon cream

Coffee is an important part of my grandparents' lives. Having lived through the Second World War and the Winter War, they both know what it is like to be without, to live on the bare necessities of life. My grandfather fought in the war, but he doesn't talk about it. My grandmother is more than willing to talk about her past; filtered and chosen versions, though, I'm sure.

Because of the war, they both went through years of coffee substitute. It seems at times as if they need coffee just to be reminded of what isn't anymore; that it is long since the war. Nowadays, as soon as 2pm rolls around, a pot of coffee is brewed and served with something sweet, usually homemade. To skip the coffee in the afternoon is unheard of.

Many times I have been sitting at their small, round kitchen table. A glass of juice - or nowadays, a cup of steaming coffee in my hand, waiting for Grandma to finish going through the cupboards for all the sweets they have. Pastries or a pie, cookies, ice cream, chocolate. There would always be something; usually quite the spread of goods. If there were ready cut pieces, the biggest one would be given to me. If there were only two pieces left for the three of us, my grandparents would share a piece to give me a whole one. Once we all had something on our plates, Grandma would start talking - about anything and everything. Stories of their neighbours, of their lives, of whatever had happened to them that week. The constant flow of her talking would not stop until one of us would get up from the table, finished long ago but not wanting to leave.

Coffee pudding with lemon cream

Coffee is slowly making its way into my life, as well. The last year of high school, I drank a lot of coffee just to stay awake to study for my finals. Nowadays, I drink coffee more for the pleasure of it than for the caffeine. It is a slow but sure process for me, to fall for coffee more and more every day. Most of my favourite moments involve coffee: a steaming cup of coffee in the morning when reading my Bible, the occasional indulgent latté in the afternoon when writing or reading.

Not only does coffee go well with sweets, it often is great in desserts. A shot of espresso in brownies - or pretty much anything made of chocolate - makes them all the more better. As it turns out, coffee also makes a great pudding. Paired with sweetened vanilla lemon cream, this pudding is packed with flavour. Though the days are longer, I still feel like a little extra energy is needed at times and this is just the dessert for those days.


Coffee Pudding with Lemon Cream
adapted from The First Mess
serves 4 to 6

* I have made this with cream and coconut milk, and I love it both ways. Using coconut milk doesn't impart coconut flavour. Rather, it just makes this pudding an easy, from-the-pantry dessert.

1 1/2 cups heavy cream (or 1 cup cream and 1/2 cup milk) OR coconut milk *
1/2 cup espresso or strong brewed coffee
1/4 cup brown sugar
2 tbsp cornstarch
1 1/2 tbsp cocoa powder
a good pinch of salt

In a small bowl, stir together brown sugar, cornstarch, cocoa powder, and salt; make sure there are no lumps. In a saucepan, bring cream and coffee to a boil, stirring constantly. Once boiling, vigorously whisk in the cornstarch mixture. Let it boil for 1 minute, than take off the heat. Spoon into serving cups and sprinkle sugar on top to prevent a skin from forming. Refrigerate for at least 3 hours before serving.


Vanilla Lemon Cream

3/4 cup heavy cream
2 to 3 tbsp sugar
zest of 1 lemon (about 1 tsp)
1/2 tbsp lemon juice
1 tsp vanilla extract or vanilla sugar

In a bowl, whip the cream, sugar, lemon zest, lemon juice, and vanilla until soft peaks start forming. Spoon a dollop of cream on top of the pudding and enjoy.

Friday, January 11, 2013

homemade yoghurt

Homemade Yoghurt

Our family has never been one of the extreme homemaking kind. Surely, and thankfully, we have never eaten much prepared foods and eating out has been somewhat of a rarer thing. (Eating out is not a thing in our culture like it is in the States.) Cakes would occasionally be baked, and there were a few years of making ice cream with our ice cream maker. However, there also were the canned pasta sauces and pre-made meatballs because corners needed to be cut. With two busy parents, there wasn't time to bake bread or make everything from scratch. Nonetheless, we were always served homey and healthy meals, even though there was the occasional shortcut or two.

What started, I believe, as a part of expanding my views, I now rather enjoy the process of making things myself. It is the discovering through the processes that keeps me hooked, and what makes it worth the time and effort put into the making. When baking something, there is always a little freedom to adapt the recipe to my taste. Brown sugar instead of white, a hefty dash of cinnamon, rolled oats sprinkled on top, fresh herbs kneaded into the dough. Whether sweet or savoury, there is room for adaptation. When cooking something, there is rather much freedom, to add and to omit. Don't like something? Leave it out. Love something? Try adding it.

There have been loaves of bread kneaded, bowls of cake and muffin batter stirred, big batches of granola baked. All this to experiment, to explore, to discover.

Homemade Yoghurt

Making yoghurt is something more than just experimenting, though. It is a step deeper into the paths of homemade things. To me, it has always been one of the extremes, like pasta, what with all the yoghurt makers and right temperatures. Then I found Jamie Oliver's recipe for homemade yoghurt and gave it a try. As it turns out, making yoghurt is much easier than I would have thoughts.

Discovering, is what all this making at home is about.

Homemade Yoghurt


Homemade Yoghurt
from The Naked Chef Takes Off

1 litre whole milk
200 ml plain yoghurt (with active cultures)

In a thick-bottomed pot, heat the milk until boiling, stirring all the time. Turn off the heat and let the milk cool until it is lukewarm, about 40 minutes. Whisk in the yoghurt, cover, and leave to room temperature for about 8 hours. The yoghurt you use as the base will affect the consistency, as different yoghurts react a little differently.

Refrigerate in an airtight container. The yoghurt will keep for about a week.

Monday, December 31, 2012

shepherd's pie

Have you ever had a favorite dish that you absolutely love but are afraid of cooking because you're sure it won't taste as good as all those times you have ordered it in a restaurant or someone else made it for you? Maybe it's a dish you have always assumed to take hours to cook (and maybe it actually does take hours to make). Maybe it's a dish that has many parts to it, complicated all. Or maybe the dish has an ingredient you have never cooked with before.

There are surprisingly many of those dishes I am somewhat terrified of trying to make. Shepherd's pie used to be one of them. But then I really wanted to eat shepherd's pie. After learning the basics of it, I made a version that was easy and simple enough for me. Now, it is one of my favorites to cook and to eat.

Shepherd's Pie

Shepherd's pie has long been a favorite of my father. As long as I can remember, whenever we have been travelling in a bigger city somewhere abroad, my father has always wanted to eat at an Irish pub if there was a chance. Can you guess the reason? Yes, shepherd's pie. It's always when we are already too hungry, when we rather argue and whine than actually try to look for a restaurant. Dad checks if there is an Irish pub near-by. If there is, we'll be there. Eating shepherd's pie or fish and chips. Maybe broccoli and cheddar soup with Irish brown bread. There would be no more arguing or whining.

There's something to those two layers; one of meat, the other of potatoes. The tomatoes give a fragrant undertone to the meat mixture, and the meat is seasoned with thyme and a little basil to bring out the best of both the meat and tomatoes. The mashed potato layer is creamy and slightly buttery, and it is the perfect accompaniment to the meat. Making the meat mixture first and letting it simmer while the potatoes are cooking, allows the meat to take on the flavors. Honestly, if any dish ever was comforting, it's this.

Shepherd's Pie

While making shepherd's pie does take some time, I find it more than worth all the time spent on making it. It is also relatively easy to make, and the finished result is oh, so cozy and tasty and comforting. There's not much better, really. And if you happen to have a relative who likes his meat and potatoes, well, all the more better. My father had to walk out of the kitchen after three helpings because the temptation to eat more was almost too much.

Shepherd's Pie
serves 8

* For an easy, everyday meal I use ground beef. This version was, though, made with 1/2 pound each of beef, pork, and moose. I love it either way. Lamb could also be used (it is shepherd's pie, after all.)

2 tbsp olive or vegetable oil
1 large yellow onion
3 to 4 garlic cloves
4 to 5 medium carrots
700g (1 1/2 lbs) ground meat (beef) *

2/3 cup beef or vegetable stock
1 (400g / 14 oz.) can peeled tomatoes
150g (5 oz.) frozen peas
1 tsp dried thyme
1/2 tsp ground black pepper
1/4 tsp dried basil
salt to taste

1.4 kg (3 lbs) all-purpose potatoes like Yukon Gold
4 tbsp butter
1/3 to 1/2 cup milk (not fat-free)
salt to taste


Preheat oven to 175C.

Peel the potatoes and set them in a large bowl and cover with cold water. Set aside. Peel and dice the onion and carrots. Peel and mince the garlic cloves. In a large skillet, sauté the onion, garlic, and carrots in oil on medium-high for a few minutes. Add the meat and sauté on high heat until the meat is browned and cooked through. Season with spices, then add the stock, tomatoes, and peas. Cover and let simmer until the mashed potatoes are ready. Season to taste with salt.

Fill a large saucepan with water and bring to a boil. In the meanwhile, cut the potatoes into quarters or sixths to reduce the cooking time. When the water boils, add the potatoes and cook until tender and done, about 15 minutes. Drain the water from potatoes. Heat up the milk and add all of the butter and about a half of the milk and mash the potatoes with potato masher, adding milk a tablespoon or two at a time until desired consistency. Season to taste with salt.

Pour the meat mixture into a large baking dish (about 13 x 9 inch). Spoon the mashed potatoes on top, spreading until the mashed potatoes cover all of the meat mixture. Place on the middle rack of the oven and bake for about 20 minutes or until bubbly and nicely browned on top. Let the casserole sit for about 15 minutes before serving.

Monday, December 10, 2012

whipped cranberry vanilla porridge

Whipped Cranberry Vanilla Porridge

Even though winter comes faithfully every year, it always catches me by a surprise. We have had snow for over a week but I keep being amazed at the winter wonderland I seem to be living in right now. Snow is very welcome in the wintertime, as everything is so much brighter when there is snow. Freshly fallen snow, untouched, also paints such a beautiful picture of peace and purity.

Winter is not my favourite season - somehow, fingers and toes frozen numb, only a few hours of daylight in December, and the coldness that is hard to shake off, do not make it a favourite of mine. Still, many of my favourite memories from my childhood set in the wintertime.

The best days have always been the ones with snow but the temperature only a few degrees below 0C (32F).  Those days you get the best out of the winter activities without completely freezing. Whether sledding or ice skating, we would put on about 17 layers of clothing to protect us from the cold, and Mom would prepare for us a thermos bottle containing hot beverage of sorts, like glögg or hot chocolate. When finally done, our fingers would be numb, noses red, and the thermos empty. Mom would meet us at the door, trying to keep the snow outside and control the chaos caused by the clothes; yet we would all end up with wet socks from the melted snow.

Whipped Cranberry Vanilla Porridge

Something about the winter makes me go back to the traditional Finnish dishes. Whipped porridge is something so very traditional Finnish and I find it fits the winter. Maybe it's the tartness of the berries, or the fact that it is eaten cold. Maybe it is the bright pink colour that is rather welcome in the dark season.

Whipped porridge is made of berries - usually lingonberries - and semolina, cooked into this pink porridge that is cooled down and then whipped until light in colour and fluffy in consistency. Once whipped, the porridge is eaten with cold milk, and a sprinkling of sugar if the tartness is too much. This porridge makes a great breakfast or a snack, although we Finns are also known for eating this for dessert.

Cranberries make the porridge fit for the season, though other berries such as lingonberries, red currants, or even raspberries could be used. I definitely recommend the addition of vanilla, though it could be left out for an even more traditional version of whipped porridge. I find the vanilla cuts nicely through the tartness, bringing out the sweetness just enough to enhance the flavour of the berries.

Whipped Cranberry Vanilla Porridge


Whipped Cranberry Vanilla Porridge
serves 4 to 6

500 ml frozen cranberries
1 litre water

3/4 tsp salt
100g sugar (adjust to taste)
150g semolina
1 tsp pure vanilla extract

Combine the cranberries and water in a saucepan, and bring to a boil. Simmer for 20 minutes, then strain the juice into a mixing bowl or a 4-cup measuring cup. Add enough water to make 1 litre and pour the cranberry juice back into a saucepan. Add sugar and salt; bring to a boil. Whisk in the semolina and simmer, stirring often, for 10 minutes.

Once the porridge is done, put the saucepan into a sink and fill the sink with cold water until it reaches halfway up the saucepan. Stirring occasionally, cool the porridge to room temperature. Pour it into a mixing bowl and add the vanilla. Beat with an electric mixer on high for 3 to 5 minutes, until lighter in colour and fluffy in consistency. Serve room temperature or cold with cold milk and sugar, if desired. Store in the refrigerator.

Monday, November 19, 2012

spiced banana cookies


On Thursday afternoon, I was watching out of a window with a cup of tea in my hands. The sky was clear and the sun was shining, a ray of sunlight flicking through the blinds and the trees just outside the window made it look like the light was dancing around the room. That moment right there, it was beautiful and peaceful.

Yet, I was sitting there out of tiredness. I was watching out of the window, hoping that the moment of stillness would help me to fight the weariness trying to take over me. I was truly tired, with that kind of tiredness that hadn't gone away with a good night's sleep and a 20-minute nap in the morning (and I  nap very rarely, so that was something).

The thing is, I felt bad about being tired. I honestly felt bad, even a little ashamed, that I would be so tired though I had slept well the night before. As I lifted the cup to my lips and sipped the hot tea, I watched out of the window. I watched, and saw beauty. The rays of sunshine pouring in through the windows. The branch of a tree waving with the wind, the sunshine behind it. The golden hue of the afternoon sun, lighting up the room.

And then, I realized.

It was okay to be tired.
It was okay to feel weary, even at the brink of exhaustion.
It was okay to not be at my best. It was okay.

Because there will always be days when you feel tired and weary. There will be days when you are feeling down, maybe even depressed. There will always be those days and that's nothing to be ashamed of. We all experience them and what matters is whether you get through them. How you get through them. For me, I find rest and comfort in the Lord. This may not be the case for you. But I do pray it would be.
Come to Me, all you who labor and are heavy laden, and I will give you rest. Take My yoke upon you and learn from Me, for I am gentle and lowly in heart, and you will find rest for your souls. For My yoke is easy and My burden is light. (Matthew 11:28-30)

Now, I suggest you go and make these cookies. Maybe you are feeling weary or down. Maybe you are feeling rested and happy. Maybe you have a sweet tooth that's acting up. Or maybe your day just needs some sugaring up. However you are feeling right now, if you happen to have a few browning bananas on your kitchen counter, I suggest you go and make these.

These cookies are fun, seriously. They are really cakey and soft, so much so that it's more like you are eating banana bread than cookies. (So if you have problems with portion control, here you go.) They are sweet but not overly so, and the spices come through beautifully. I absolutely love these with a cup of black tea, and have been enjoying these on many afternoons now.


Spiced Banana Cookies
adapted from Simply Recipes

115g butter, room temperature
1/2 cup sugar
1/2 cup brown sugar
1 large egg
1/2 tsp vanilla extract

1 cup mashed bananas (about 2 to 3 medium)
1 tsp baking soda
2 cups plain flour
3/4 tsp groung cinnamon
1/2 tsp groung nutmeg
1/4 tsp ground cloves
a good pinch of ground ginger
a pinch of salt


Preheat oven to 175C. With an electric mixer, beat the butter and sugars together until light and fluffy. Add the egg and vanilla, and beat until light and fluffy. In a small bowl, stir together the mashed bananas and baking soda; set aside for 2 minutes. Stir the banana mixture into the wet ingredients.

In a bowl, combine the flour and spices. Stir into the wet ingredients, mixing until just combined. Drop tablespoonfuls of batter on a baking tray lined with parchment paper. Bake the cookies for 11 to 13 minutes, or until golden brown.

Friday, November 9, 2012

mexican-style ground beef soup


Somewhere along the years, we stopped eating dinner together as a family. Busy, irregular schedules did that. There would rarely be more than two to eat dinner at the same time, and usually at least one of those would be going to the gym or for a run, hence not eating dinner but later. And if it was me and my sister that were at home, dinner would often be eaten watching TV (together at least).

For a longer time now, Saturdays have been the only times we gather together as a family to eat dinner each week. And those times, I'm sure, we all cherish. The time spent together, sharing everything that is pressing in our lives. That Saturday dinner is always a time of laughter as my sister keeps us entertained with her jokes and funny stories of her life. As we leave the table - after an hour or an hour and a half, usually - the sense of a family has been restored.

So nowadays, if it happens that all of us - or at least most of us - happen to be at home for dinner during the week, it is always somehow special. The same kind of special as when you were a child and Dad would come home early one afternoon and you got to spend extra time with him. The same kind of special as when you visited Grandpa and he snuck you an ice cream. The same kind of special as when you got to help Mom in the kitchen.


Now, please don't get confused with the name. The only reason this is called Mexican-style soup is that it has corn and kidney beans in it. And it's tomato-based. Somehow, those ingredients make this soup Mexican to me. I don't even know. Please, someone tell me you also do this.

Nevertheless, this is a very easy and tasty soup. It is very hearty but also packs in a bunch of vegetables, which I love. I made this soup with a can of diced tomatoes with spicy red pepper and I loved the kick it brought. This is definitely a keeper for those chilly evenings that are already around the corner.


Mexican-style Ground Beef Soup
serves 6

Note: I used a can of diced tomatoes with spicy red pepper and loved the heat. However, if you are serving this to (small) children, I would recommend using plain diced tomatoes and adding a pinch of red pepper flakes or cayenne pepper for heat. We ate this soup with a good dollop of sour cream, which is not only delicious in the soup but also takes the edge off the heat.

1 (400g) can diced tomatoes *(see note)
4 cups beef or vegetable stock
5 to 6 medium potatoes
2 to 3 medium carrots
1/2 tsp dried basil
1/4 tsp dried thyme

1 tbsp olive oil
1 medium onion
2 garlic cloves
400g ground beef
1/4 tsp ground cumin
1/4 tsp ground coriander
150g frozen corn
100g frozen, chopped green beans

1 cup red kidney beans, drained and rinsed
salt and ground black pepper, to taste

+ sour cream to serve


In a large pot, bring the diced tomatoes and stock with the basil and thyme to a boil. Meanwhile, peel the carrots and slice them. Put the carrots to the pot and simmer for 10 minutes. Peel the potatoes and cut them into 1-inch pieces. Put them to the pot with the carrots after the 10 minutes have passed.

Peel the onion and garlic cloves. Dice the onion and mince the garlic. Heat the olive oil over medium-high heat in a skillet and sauté the onion and garlic for 2 to 3 minutes. Add the ground beef and brown on high heat until evenly cooked. Season with the cumin and coriander, then add the frozen corn and green beans. Lower the heat to medium-low and sauté until the vegetables have heated through. Add the ground beef mixture to the pot and simmer until the potatoes and carrots have softened, about 10 to 20 minutes.

Once all the vegetables are cooked through, turn off the heat and add the kidney beans to the soup to warm through. Season to taste with salt and black pepper. Serve with a good dollop of sour cream, if desired.

Monday, November 5, 2012

chocolate chip espresso muffins


It feels as if I am baking purely for brain fuel nowadays. Because when you spend most of your free time writing, there comes times when all the words seem to be used, all the thoughts already written down, all the emotions poured out.

When it feels like I am stuck between thoughts, muffins are a good option. Muffins are easy to make and there are plenty of options as for the kinds of muffins you can bake. The act of baking always manages to relax me. I love baking just for that. There isn't much flexibility in baking; rather, the fixed ratios are very important if you want something edible as a result. Still, there is always something small that can be done to make the baked good more to your taste. Whether it is adding spices or chocolate, using different flours or sugars, making muffins instead of a cake. That's why I like baking so much. It takes time and trials to know what you like, and what you don't like. It takes time to know what goes well with what.

And while there is the excitement of trying something new when baking, you can also find comfort in baking those goods you have been baking for years now. In using those old recipes that are perfect just as they are. For those days when you are feeling adventurous, the internet is full of new recipes and ideas for you to try. And when comfort is needed, there is no judgement to be found in baking those brownies you have been making for the last 10 years without changing anything. If it's good, no explanations are needed. All will be received with a glad heart.


If there ever is a time when words fail me, chocolate and coffee usually help. When those two are combined in a muffin form with a delicious oat streusel topping, it seems as if words start to flow again. Thoughts start clearing up and taking a form.

As for these muffins, they pack flavour as the espresso and dark chocolate come together, but these aren't too sweet. Rather, they are hearty, full-bodied muffins with a sweet streusel topping, and I love them as they are. However, if you are looking for sweet muffins specifically, I'd recommend adding maybe 1/4 cup white sugar and a little more yoghurt if the mixture seems too dry. Another option is using milk chocolate, which would add some sweetness to the mix as well.

Chocolate Chip Espresso Muffins
adapted from Sprouted Kitchen
makes 12

115g butter
2 eggs
1/3 cup + 1 tbsp plain whole milk yoghurt
1 tsp vanilla bean paste (or vanilla extract)

11/3 cups plain flour
3/4 cup spelt flour
3/4 cup packed brown sugar
1 tbsp espresso (or finely ground coffee)
2 tsp cinnamon
1 tsp baking powder
1/2 tsp baking soda
1/2 tsp salt

100g dark chocolate, chopped

Streusel Topping:
30g cold, salted butter, cut into pieces
1/2 cup old-fashioned rolled oats
1/4 cup turbinado sugar


Preheat oven to 175C and grease a muffin pan or line with paper lines.

Place the butter in a small saucepan over medium heat, and let it melt. Watch the butter as foam starts to form and when the butter starts to bubble, stir it with a spatula. When the foam starts to subside, watch for small brown flecks in the bottom of the saucepan. When you see the brown flecks, take the butter off the heat and set aside to cool. The butter should be light brown in colour.

In a small bowl, whisk together the eggs, yoghurt and vanilla. When the butter has cooled, whisk it in as well.

In a bowl, whisk together the dry ingredients, making sure there are no brown sugar lumps. Add the wet ingredients to the dry ingredients and stir until just combined. Stir in the chopped dark chocolate and mix until just combined. Be careful not to overmix. Divide the batter evenly into the prepared 12 muffin tins.

In a small bowl, rub the streusel topping ingredients with your fingers until the butter is evenly mixed into the oats and sugar. Sprinkle the streusel topping evenly on top of the muffins.

Bake the muffins on the middle rack for 18 to 20 minutes, or until a toothpick inserted in the center comes out clean.

Saturday, October 27, 2012

quick weeknight pasta sauce with mushrooms


As a kid, I didn't like pasta nor tomato-based sauces. I'm still not exactly sure why. I guess pasta was boring and tomato-based sauces - or sauces in general - just weren't my cup of tea. So, instead of eating pasta with sauce like all the other children would do, I usually ate pasta with plain ground beef. (Seriously. Pasta and seasoned, browned ground beef. Not even ketchup on top. So weird.) The best part is, my sister used to be the same. So we never ate pasta with any kind of sauce.

Then, some years ago, we had one of those relaxed dinners at a friend's house. The dad made spaghetti bolognese but added cream to the sauce and let it simmer for an hour or so. And I? I started eating pasta with sauce, any sort.


This recipe is for those weeknights when dinner needs to be on the table, like, now. Easy to make, quick to cook and from toddlers to grannies, it is a crowd-pleaser. This pasta sauce relies heavily on the pantry but does not taste like it. It is hearty, comforting, and seriously good for a sauce (and dinner) that comes together in about 30 minutes.


Quick Weeknight Pasta Sauce with Mushrooms
serves 4 to 6

* I always try to use the best quality canned tomatoes I can find but even so, there is sometimes that acidic taste that comes from using canned tomatoes. If that is the case, add a scant tablespoon of honey to the sauce. This won't sweeten the sauce but helps to mellow out the acidity.

200g white button mushrooms

1 tbsp extra-virgin olive oil
1 medium onion
2 garlic cloves
400g ground beef

1 (400g) can diced tomatoes with the juice
1/2 can water
2 to 3 tbsp tomato paste (optional)
1 beef bouillon cube
1/2 tsp ground black pepper
1/2 tsp dried basil
1/2 tsp dried thyme
* honey (optional)


Wash well and slice the mushrooms. Place them into a skillet over medium heat and sauté until they are done sweating, about 3 or 4 minutes. Set aside on a plate or in a bowl.

While the mushrooms are sweating, peel the onion and garlic cloves. Dice the onion and mince the garlic. Add the oil to the now empty skillet and sauté the onion until softened and translucent. Add the minced garlic and sauté for a minute or so. Add the ground beef and brown until cooked through.

Add the diced tomatoes, then fill the empty can halfway through with water and pour it into the skillet. Add the mushrooms, tomato paste, bouillon and spices; heat until bubbling. Lower the heat and simmer for about 15 minutes, stirring a few times. (Ideally, this is the point where you want to boil the pasta and when the pasta is ready, so is the sauce.) Season to taste with salt and ground black pepper.

Monday, October 22, 2012

chai concentrate


Yellow trees. Brown trees. Bare trees. Rainy days and rain boots. Wet, muddy ground. Crunching leaves from the neighbour's maple tree. Cups and cups of tea; herbal when you start feeling jittery. Knit tops and boots, scarves and woollen socks. Blankets and books. Fire burning in the fireplace. A few red apples still in the tree; many fallen on the ground. Apples, in pies and crisps and crumbles. Bared emotions. Hot chocolate and walks in the woods. Silence.

The crisp, cold mornings call for wrapping the biggest scarf you can find around yourself. Shoving your hands deep into the pockets when you realize you forgot your mittens. Woollen socks are becoming a necessity. A pot of soup is cooking on the stove at least once a week. Reading books while wrapped in a blanket is starting to sound like the perfect evening pastime. Stillness is starting to settle into the hearts; the stillness of the winter closing in.

This is what October looks like right now.

While late autumn and winter are not my favourite (I much prefer summer and early autumn), I still love to make the most of every season. Which, to me, means pulling on my orange rain boots and going for a walk in the muddy woods. It means making a big pot of soup to warm up the evenings. It means putting on a pair of woollen socks and wearing layers when going outside. It means curling up in a chair and reading a book.

And it means indulging in chai lattes to endure those rainy days. Lattes, in general, are a favourite of mine. With the warming spices and creaminess, chai lattes are made for crisp or rainy autumn days. On those days when something extra is needed, add a shot of espresso to make a dirty chai latte. Dirty chai latte is the perfect combination, in my opinion, of spices, tea and coffee, mixed together into creamy goodness.


Chai Concentrate
adapted from a wooden nest
makes about 4 cups

4 1/2 cups water
1 cinnamon stick
1 (1.5-inch) piece ginger
1/2 tsp cardamom seeds
2 star anise pods
10 whole cloves
1 tsp orange zest
1/2 tsp ground nutmeg
1/4 tsp ground black pepper
11 bags of black tea

scant 1/2 cup brown sugar *
1 tbsp honey
1 tbsp pure vanilla extract

Measure and prepare the spices and tea bags. Bring the water to a boil in a saucepan; add the spices and tea. Turn off the heat and let steep for 15 minutes. Strain the mixture into a 4-cup measuring bowl or cup. Whisk in the brown sugar, honey, and vanilla extract; stir until the sugar has dissolved. Pour into a bottle or a jar, and store in the refrigerator.

To make chai lattes, use 1 part concentrate and 1 part milk. Heat up or pour over ice to make an iced chai latte.

* While this makes a sweet chai latte, I don't like my chai lattes overly sweet and found this was the perfect amount of sugar for me. If you like yours sweet, add more brown sugar.


Dirty Chai Latte
makes 1 serving

1/2 cup chai spice concentrate
1/2 cup milk
a shot of espresso (or 1/4 cup strong coffee)

Combine the chai concentrate and milk; heat until warm. Make the espresso (or coffee) and pour it into the chai latte. Enjoy.

Monday, October 8, 2012

pear & coconut spice muffins


In addition to a sweet 3-year-old, I take care of a temperamental toddler with quick feet. From the moment she wakes up until the end of my work day, she keeps me busy running after her and trying to keep her safe.

She is a bundle of energy, if anything. She likes to test and try everything possible. She is tall enough to reach and climb things, and that's exactly what she does. She will throw a fit if she doesn't get what she wants. When she is hungry and/or tired, she gets cranky and with her, cranky means trying to do everything she has been told not to. In other words, she keeps me on my toes all day long.


She is also absolutely and totally adorable, and always makes my day. She loves music, and we sing and dance together every day. At the age of 1 year 9 months, she is fast learning to talk and amazes me every day with her expanding vocabulary and the 2-word sentences she's already managing very well. She loves to read books together, and if I'm out of her sight for more than 10 minutes, she will come running and asks to be held. She often makes herself laugh, and it is the funniest thing ever.

All this is to say, oftentimes a moment of silence and stillness is highly appreciated around here. A moment to sit down, to collect my thoughts. To breathe in and calm down. Which leads me to my new favourite: getting home early in the afternoon to take the moment and delight in the silence, to brew myself a cup of coffee and enjoy it with something sweet. That is what these muffins were baked for. Having a few early mornings this week thankfully also means getting home earlier and enjoying a moment or two of silence.


In these muffins, warming spices combine with pears to make a delicious, seasonal treat. The addition of coconut, which happens to be one of my favourites, makes them a touch more indulgent, as does the browned butter. Even so, these are a healthy enough treat to have with a cup of coffee or tea without any need to feel guilty. I mean, they are packed with fruit and fruit is healthy, right? Moreover, these are perfectly spiced in the comforting way to make the best of that quiet moment or two you might find.

I had some firm but sweet pears that I shredded, and I loved the moist, somewhat crumbly muffin that resulted from the shredded pears. In case the only pears you can get your hands on are those juicy, soft pears, finely dice them as shredding them would not work. I didn't have any ground ginger this time but next time I am going to add a pinch of ground ginger to the mix as well.

Pear & Coconut Spice Muffins
adapted from The Flourishing Foodie
makes 12 muffins

60g (4 tbsp) butter

1 1/2 cups all-purpose flour
1/2 cup whole wheat flour
1/2 cup packed brown sugar
3 tsp baking powder
1/2 tsp salt
heaping 1/2 tsp cinnamon
a good pinch of nutmeg

1/2 cup full-fat coconut milk
1 large egg
1 tsp pure vanilla extract
1 1/2 cups peeled and shredded or finely diced pears (about 3 or 4 medium pears)
1/2 cup dried shredded coconut

Topping:
4 tbsp dried shredded coconut
4 tbsp brown sugar
1 tbsp all-purpose flour
15g (1 tbsp) cold salted butter, cubed
a pinch of cinnamon


Preheat oven to 190C. Line a muffin tin with 12 baking cups.

Place the butter in a small saucepan over medium heat, and let it melt. Watch the butter as foam starts to form and when the butter starts to bubble, stir it with a spatula. When the foam starts to subside, watch for small brown flecks in the bottom of the saucepan. When you see the brown flecks, take the butter off the heat and set aside to cool. The butter should be light brown in colour.

In a bowl, combine the flours, sugar, baking powder, salt, and spices. Make sure that there are no lumps of brown sugar anywhere. In another bowl, lightly whisk together coconut milk, egg, and vanilla. Stir the pears into the mixture.

Add the dry ingredients, shredded coconut, and browned butter to the wet ingredients. Mix until just combined. Spoon the mixture evenly to the prepared muffin tin.

In a small bowl, rub together the topping ingredients with your fingers. Sprinkle on top of the muffins. Place the muffins into the oven and bake for 18 to 20 minutes, or until a toothpick inserted in the center comes out clean. Let the muffins cool for at least an hour before eating.

Tuesday, September 25, 2012

brussels sprouts sauté

Brussels sprouts and I, we didn't start off exactly on the right foot. The first time I tasted Brussels sprouts, I was five and in the hospital. Brussels sprouts were served for lunch. They were boiled, and that was it. Boiled, with no spices whatsoever. For a 5-year-old, those Brussels sprouts were the embodiment of everything bad and stinky.

Those Brussels sprouts are one of the very few memories I have from the time spent in the hospital, and I think that in itself speaks of how horrendous the Brussels sprouts must have been. I am sure, though, that I am not the only one with bad memories or horror stories of Brussels sprouts from the childhood.


I have grown up since then, though, and growing up sometimes means giving things and people a second chance. And honestly, I am glad I did that with Brussels sprouts. When prepared the right way - which clearly is not boiled with no spices - Brussels sprouts are actually quite tasty and make a great side dish.

I found that with the trusty combination of butter and fresh thyme, those Brussels sprouts turned into a tasty side dish great for the autumn time. Quickly sautéing the Brussels sprouts leaves them still slightly crunchy, which is what I prefer. Turning up the heat for the last minute and getting a touch of colour to those Brussels sprouts also deepens the flavours, and I recommend doing just that.


Brussels Sprouts Sauté
serves 4 as a side

2 tbsp butter
1 small onion
1 tbsp chopped, fresh thyme
600g Brussels sprouts
salt to taste

Wash the Brussels sprouts well. Trim the stem ends and remove any loose or discoloured outer leaves. Stand the Brussels sprouts on their trimmed ends and thinly slice them into 3 or 4 slices.

Peel and slice the onion. In a saucepan, melt the butter over medium heat and add the onion, Brussels sprouts, and thyme. Sauté until the Brussels sprouts turn bright green and start to soften, about 5 minutes. Turn the heat to medium-high and sauté the Brussels sprouts for a minute or so, until some browning starts to occur. Take off the heat and salt to taste.

Tuesday, September 18, 2012

peanut butter & honey granola + raspberry compote


Before the year in the States, I don't think I ever actually had tasted peanut butter. When I moved to the States, I didn't quite understand the hype about peanut butter; why people would eat it straight from the jar by the spoonfuls. And I certainly didn't understand peanut butter and jelly sandwiches. To me, they seemed more like dessert than lunch.

Then, well, I lived in the States for a year. I, too, started to eat peanut butter by the spoonfuls (Peanut Butter & Co. is my favourite brand). The peanut butters sold here in Finland aren't quite as good, though, and so I have given up on eating it by the spoonfuls. This is not to say that they would actually taste bad. It's just different enough for me to not want to eat it as it is. Instead, I use peanut butter in cooking and baking when the craving for it comes.

All this is to say that peanut butter makes great sandwiches. Not only are they delicious but they also keep in the room temperature for a while. The Scandinavian sandwiches - which consist of deli ham and cheese, and sometimes gravlax and/or eggs - do not. I'm not really a fan of PB&J, though. I prefer my peanut butter sandwich with a sliced banana and sometimes honey if I want it sweeter.


Now, on to the granola. Fragrant honey and flavourful peanut butter combine wonderfully in this granola, making it a grown-up and somewhat more sophisticated version of the loved sandwich. It is fitting for breakfast or as a snack, even lunch. Some chocolate chips could turn this either into a very indulgent breakfast or a healthy dessert.

My favourite way to eat this is to top some plain Greek yoghurt with this granola and squeeze a little honey on top to enhance the flavour. However, as I started to think about peanut butter & jelly sandwiches while making this granola, I found myself craving the said sandwich. I, then, made a quick and easy raspberry compote from frozen raspberries to turn the sandwich into a yoghurt concoction of sorts. In case you are craving for a peanut butter & jelly sandwich as well, the recipe for the raspberry compote is also provided and highly recommended.


Peanut Butter & Honey Granola
makes 3 cups without any add-ins

1/4 cup canola oil
1/3 cup peanut butter
1/3 cup honey *
1 tsp cinnamon
1/2 tsp salt **

3 cups rolled oats
2 to 3 tbsp ground flaxseeds (optional)

Possible add-ins: 1/2 cup dry-roasted (or honey-roasted) peanuts; 1/2 cup dried fruit like raisins or banana chips; 1/2 cup dark chocolate chips


Preheat oven to 130C (275F). In a small saucepan, combine the oil, peanut butter, honey, cinnamon, and salt. Heat the mixture over medium heat until liquid and runny. Pour the peanut butter mixture over the rolled oats and flaxseeds, if using. Stir until everything is coated with peanut butter, then pour the mixture on a baking tray lined with parchment paper. Bake for about 40 minutes, flipping once or twice while baking, until the granola is golden and crunchy.

Let the granola cool to room temperature. Add any of the add-ins, if desired. Store in an airtight container.

* This amount of honey results in a slightly sweetened granola, which is what I prefer. If you like your granola sweeter, I recommend adding up to 1/4 cup brown sugar. However, I like to just squeeze more honey on top of the granola if I happen to want it sweeter.

** The peanut butter I used was slightly salted and I found the 1/2 tsp of salt was the perfect amount for my granola. The amount of salt might need adjustment depending on whether or not your peanut butter is salted and how you like your granola.


Raspberry Compote
makes 1 cup

2 cups frozen raspberries
2  to 4 tbsp sugar, to taste
1 tsp pure vanilla extract or 1/2 tsp vanilla bean paste
1 tsp potato starch

Slowly thaw the frozen raspberries in a saucepan over medium heat. When the raspberries are starting to get thawed, after about 3 to 5 minutes, add in the sugar and vanilla. When the raspberries are starting to get mushy, add in the potato starch and mix well. Bring the mixture to a boil, then take off the heat. Let it cool to room temperature before refrigerating. The compote will get thicker after cooling down and refrigerating.

This recipe makes a thick compote. For a runnier compote, I recommend adding only 1/2 tsp potato starch.

Wednesday, September 12, 2012

curried carrot coconut soup


Potatoes, carrots, turnips, beets, onions. They are all rather delightful, these root vegetables. They are rustic, homey and above all, comforting. Available through the year and making it even in the harsh conditions, root vegetables are a winner in my book. They are often also taken for granted; overlooked. Now, more than ever, I think it is time to start paying attention to these beautiful gems of the nature. Maybe it is because I come from a country of long and harsh winters. Root vegetables are what has kept this nation alive for centuries. (Just kidding. Kind of. Some credit also goes to rye bread.)

Soups, stews, curries. Mashed or whole. Grated, sliced, diced. Raw, roasted, boiled, even pickled. Appetizer, side, or a main. Even dessert in some cases. Are you as amazed as I am?


When the weather take a turn for the chillier temperatures, I start making soups and curries out of root vegetables. In the wintertime, there is always a bag of carrots lying around in case a quick and warming dinner is in order. I love how easy carrots are in that regard. Combined with some pantry staples such as lentils, coconut milk, and spices, they quickly will turn into a healthy, comforting dinner.

I love the combination of creamy coconut milk and the warming spices; the way they balance each other out and result in a delicious soup. This is the soup for those evenings when all you want is to curl up in a blanket with some soup and a cup of tea, and read a book or watch a movie you've meant to watch for a few weeks nows.


And, hopefully, you will stop and smile when you sip down the soup. Smile and start, though maybe slowly, being more aware and appreciate more those beautiful (in this case, orange) root vegetables that are waiting to be used.

Curried Carrot Coconut Soup
serves 6

2 tbsp extra-virgin olive oil
1 medium onion
2 garlic cloves
1 kg carrots

2 tsp curry powder
1/2 tsp ground cumin
1/4 tsp ground coriander
a pinch of ground chili pepper or red pepper flakes

100g red lentils, picked over and rinsed
1 litre vegetable stock
1 can coconut milk, divided


Peel and dice the onion and carrots. Peel and mince the garlic cloves. In a saucepan, heat the olive oil over medium heat. Add the onion, carrots, and garlic; sauté for a few minutes. Add the spices, and sauté for 30 seconds. Add the lentils and vegetable stock. Bring to a boil and simmer, over medium-low heat, until the carrots are tender and the lentils are falling apart, about 25 minutes.

Purée the soup using an immersion blender (or a blender) and thin the soup to the consistency of your liking with the coconut milk. (I used about a cup.) Season to taste with salt and pepper. Spoon what is left of the coconut milk on top of the individual servings.